Command forms
Command forms are used to transfer parameters to workflow process. We recommend you look through the following two topics from Workflow Engine.NET documentation to understand this section better:
Command form is an ordinary form which is used to transfer parameters into the process. However, for this form to be displayed to user before command execution, it must be bound to command. It can be done in the admin panel - Workflow/Command forms. Here you create entities, binding forms and workflow commands. Control elements in this interface have the following functions:
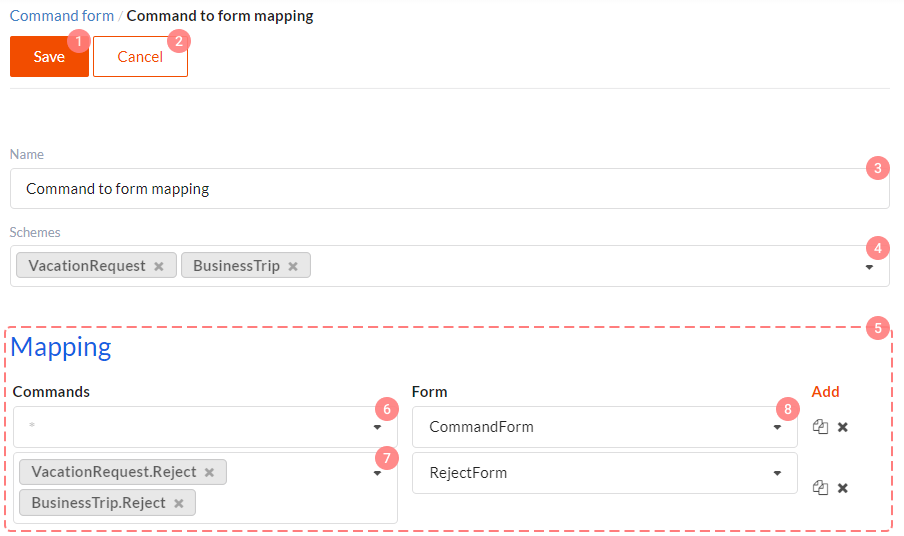
- Save - saves mapping.
- Cancel - cancels unsaved changes made to mapping.
- Name - mapping name. Is used for convenience purposes only and is not applied in code.
- Schemes - here you can select one, several or all (special value '*') workflow process schemes, to which mapping will be applied. Two schemes have been selected in our example (see picture) - VacationRequest and BusinessTrip.
- Mapping section where we set which form will be displayed for this or that command.
- In Commands column it is set that form in the Form column will be displayed for all scheme commands, listed in the Schemes field. However, such entity priority is lower than priority for entity in which commands are specified explicitly.
- In Commands it is set that from in the Form column will be displayed for certain commands. In our example we selected Reject command for VacationRequest and BusinessTrip schemes.
- Here we select any form in the application.
There can be many mapping entities in the Workflow/Command forms section, but they are all equal. Let's see how DWKit defines which form should be displayed for this or that command. Say, we're searching for a form for the 'SchemeName' scheme and 'CommandName' command.
- First, we search for all mappings in which scheme names are specified explicitly in the Schemes list. And 'SchemeName' is on that list.
- Next, in all mappings found in the previous step we search for the first entity with the 'CommandName' in the Commands list. If such entity has been found, we use form specified in it.
- If form has not been found, we search for the first entity for which Commands = '*', i.e. this is entity for all commands. If such entity has been found, we use form specified in it.
- If form has not been found yet, we search for all mappings for which Schemes = '*', i.e. this is mapping for all schemes. If there are no such mappings, it is presumed that there is no form bound to command and nothing is to be displayed.
- In all mappings found in the previous step we search for the first entity in which 'CommandName' is explicitly specified in the Commands list. If such entity has been found, we use form specified in it.
- If form has not been found, we search for the first entity for which Commands = '*', i.e. this is the entity for all commands in all schemes.
- If there is no such form, it is presumed that no form is bound to command and nothing is to be displayed.
Thus, entities in which schemes and commands are specified explicitly have the highest priority, and those with Schemes = '*' and Commands = '*' - the lowest.
Pay attention that for the command form to be displayed, workflowShowCommandForm action must be included into the client actions chain
handling onCommandClick event for the Workflow Bar component.
Creating form to transfer parameters to process
Form to transfer parameters into process is an ordinary form with any interface. For example, like the form on the picture below.
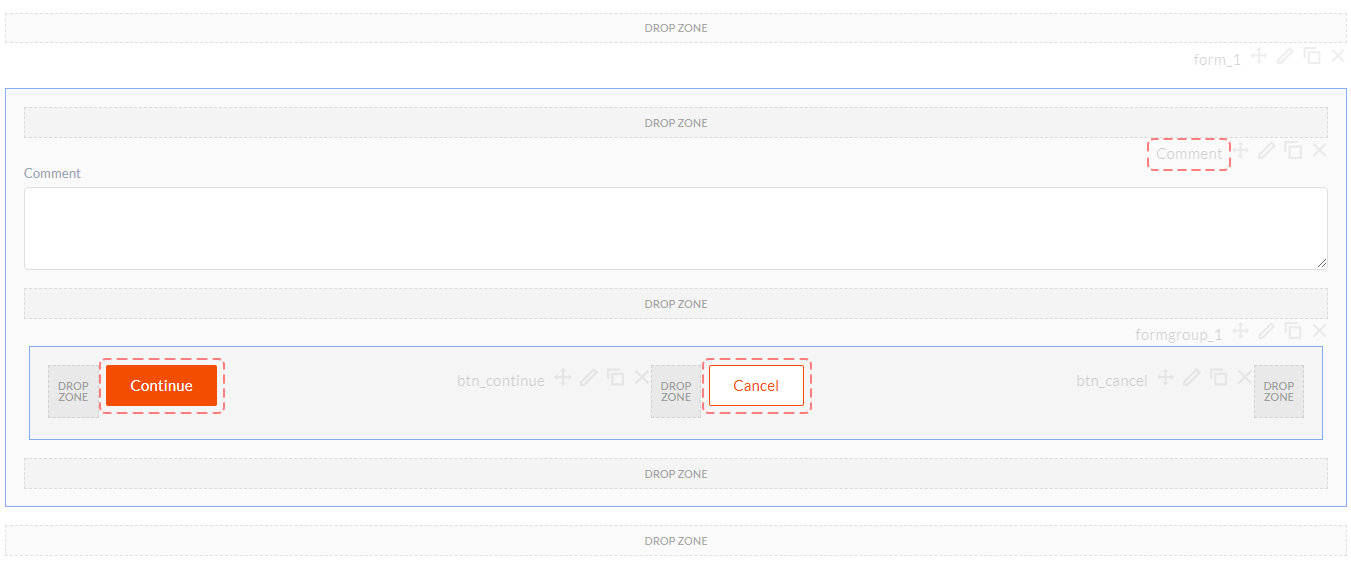
However, it has two peculiar features.
First of all it is recommended to give user the opportunity to cancel command, that is why Cancel button was added into the form. Also, there is a Continue button in the form. Click it to continue the command execution.
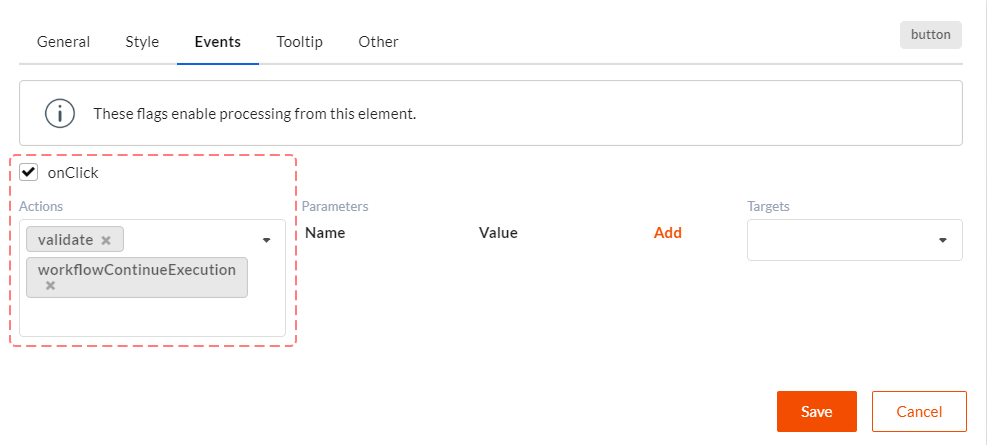
For the Continue button to work, its onClick event must execute the following chain of client
actions: validate, workflowContinueExecution. I.e. first we validate parameters in the form, and if the form is valid, we continue
execution. Validation in this case is no different from regular client form validation, you write it yourself for the form.
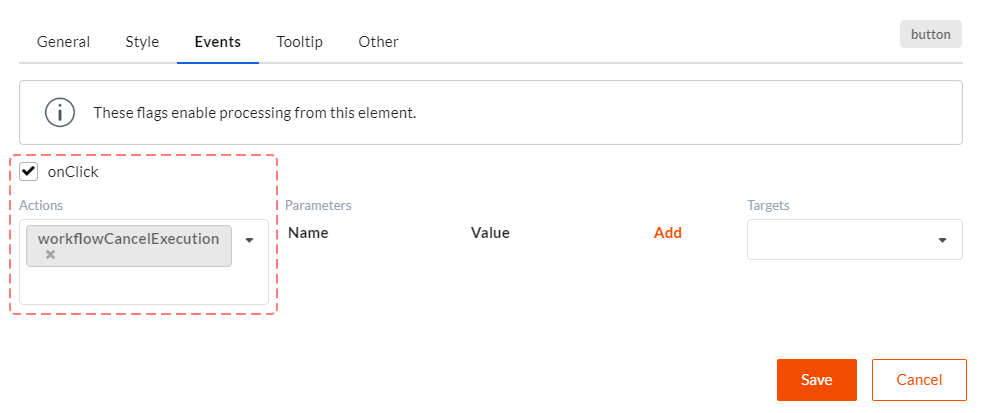
For the Cancel button to work, its onClick event must execute the following chain of client actions: workflowCancelExecution. Clicking
the Cancel button in this case will close the form with parameters and stop all actions.
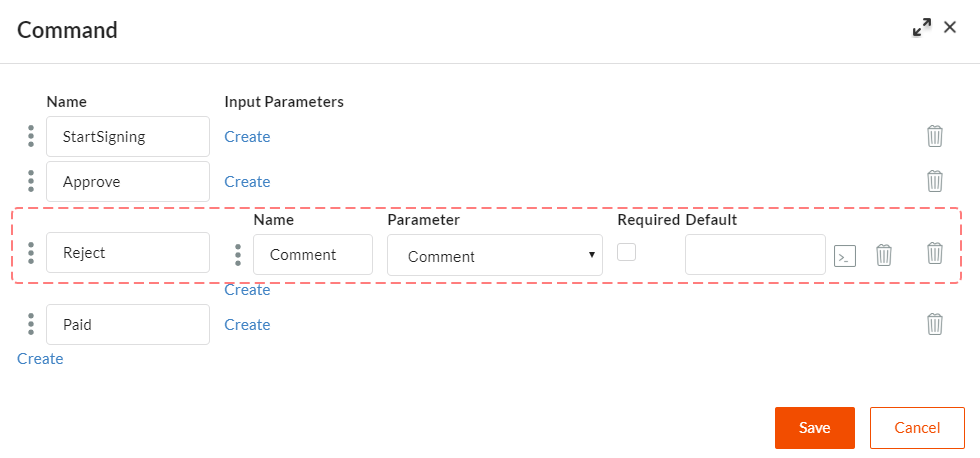
Secondly, when creating a form to transfer parameters, you need to stick to the following rule: If you want the value from the ' ComponentName' component to be transferred to process via command, a parameter with a name equal to 'ComponentName' must be specified for this command. On the picture below, 'Reject' command has one 'Comment' parameter, and the component with the same name exists on the parameter transfer form.