Security objects editing
In this section we will briefly discuss how to edit Security main objects via the admin panel.
Users
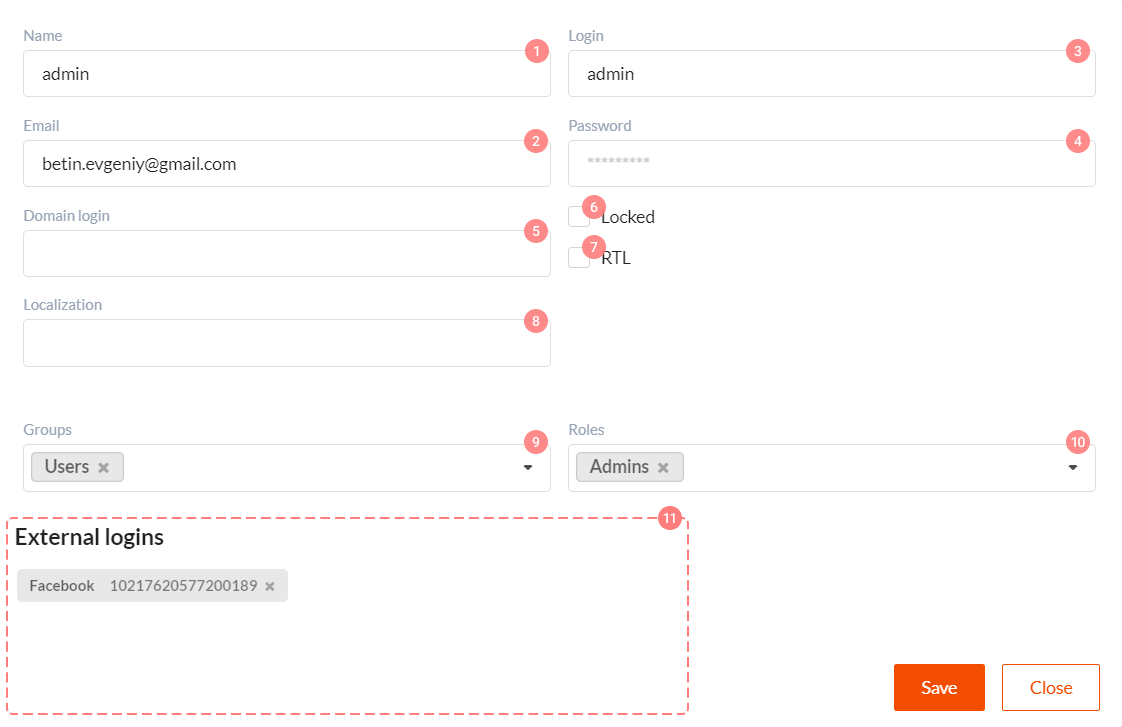
Control elements in user editing form have the following functions:
- Name - user name.
- Email - user e-mail, which can be used for notification. It is critical if you're using external authentication providers.
- Login - user login, which is required if we want our user to be authenticated by login and password (hash), stored in DWKit database.
- Password - user password, its hash is stored in DWKit database.
- Domain login - this field is required, only if you're using Windows domain authentication. This mechanism is outdated, and we recommend to use it for compatibility reasons only. We suggest using external authentication providers.
- Locked - if you check this checkbox, user will not be able to log in and perform any operations in the system.
- RTL - if you check this checkbox, user will see right-to-left interface both in the admin panel and in the main app.
- Localization - localization file name, which will be loaded for user.
- Groups - user groups list.
- Roles - user roles list.
- External logins - user credentials list, created when authenticating via external authentication providers.
- Save - saving user entity to database.
- Close - exit without saving.
User groups

User groups editing interface is very simple. Here we can specify group name and list of roles assigned to all users in the group. Sync with domain checkbox means that the group was received via LDAP. Learn more about LDAP here.
Permissions and permission groups
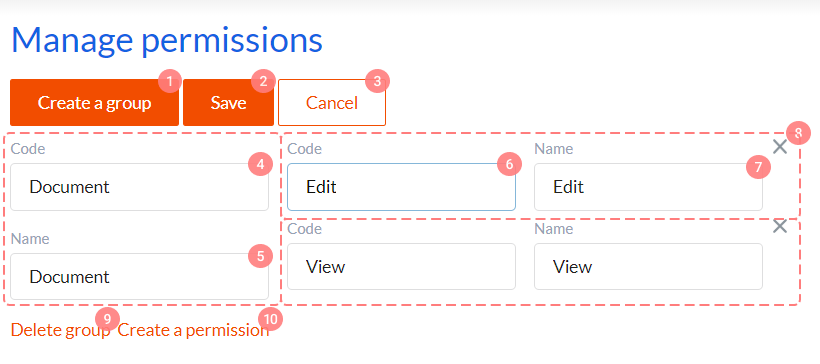
Permissions editing interface displays all groups and permissions in the system. Its control elements have the following functions:
- Create a group - button for creating new group of permissions.
- Save - saves all changes made in current view.
- Cancel - cancels all unsaved changes.
- Code - permissions group system name.
- Name - permissions group name.
- Code - permission system name.
- Name - permission name.
- Button for deleting permission from group.
- Delete group - button for deleting group of permissions.
- Create a permission - button for creating new permission in group.
You can see that one group of permissions can contain multiple permissions.
Roles
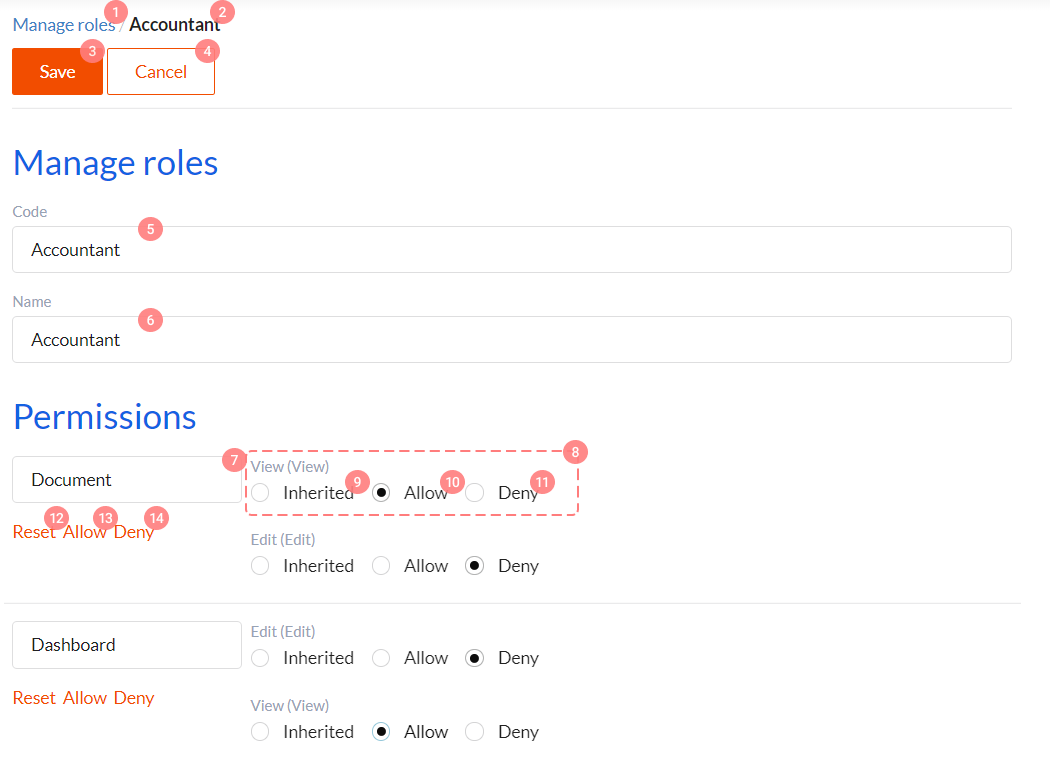
We must specify role-related type of access for each permission in role editing interface. There can be three types of access:
- inherited - i.e. non-defined.
- allow
- deny
Learn more about calculating result values for permissions in the following section. Control elements in this interface have the following functions:
- Redirect to the list of all roles in the system.
- Edited role name.
- Save - saves all changes, made in current view.
- Cancel - cancels all unsaved changes.
- Code - role system name.
- Name - role name.
- Permissions group name, cannot be edited.
- Permission name, cannot be edited.
- Elements 9-11 allow us to select one of the three types of access for permission (inherited, allow, deny).
- Reset - sets all permissions in group as inherited.
- Allow - sets all permissions in group as allow.
- Deny - sets all permissions in group as deny.